
Manually Create Sales Invoices
Miragebooks simplifies the process of creating, sending, saving, and printing custom invoices, providing business owners with a fast and efficient solution for their invoicing needs. With its intuitive interface, users can easily generate professional and compliant sales invoices tailored to their specific business requirements within minutes. Additionally, Miragebooks offers a diverse range of channels to send invoices to clients, including secure and professional options such as email, chat applications, and cloud-based file sharing services like Google Drive.
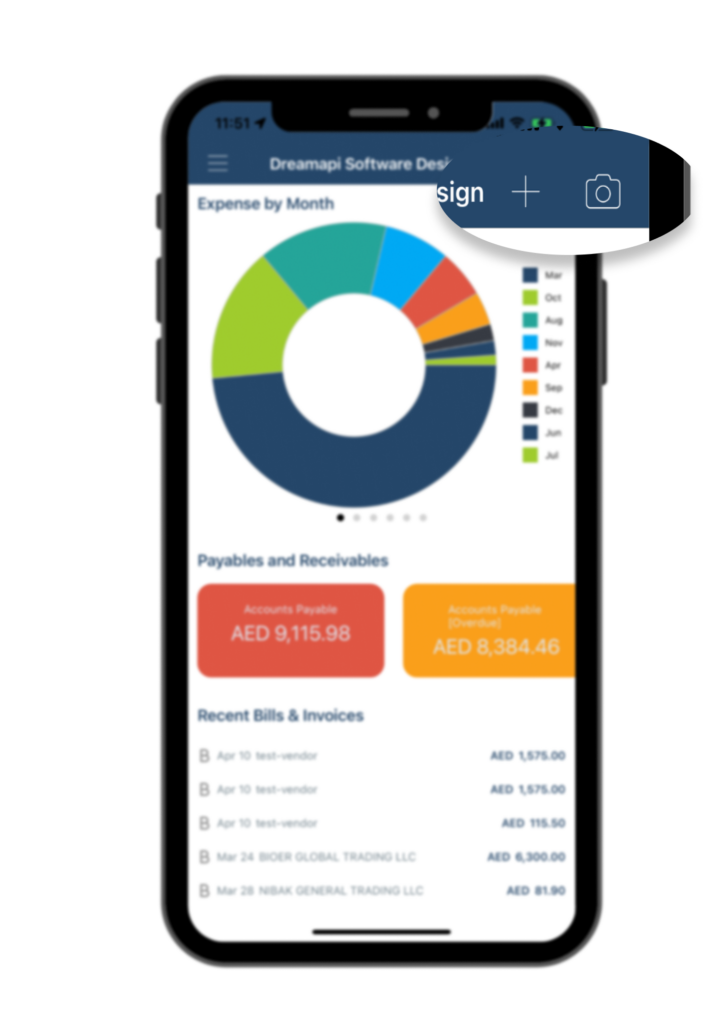
Go to the dashboard page and click on the “+” button at the upper right corner, next to the Camera button.
You will be presented with four options for adding the bills or sales invoices. The first two options are for manually adding bills, which is introduced in Bills section. If you would like more instructions on adding bills please refer to Bills section.
For manually adding invoices, choose either Sales Invoice or Sales Invoice (non taxable).
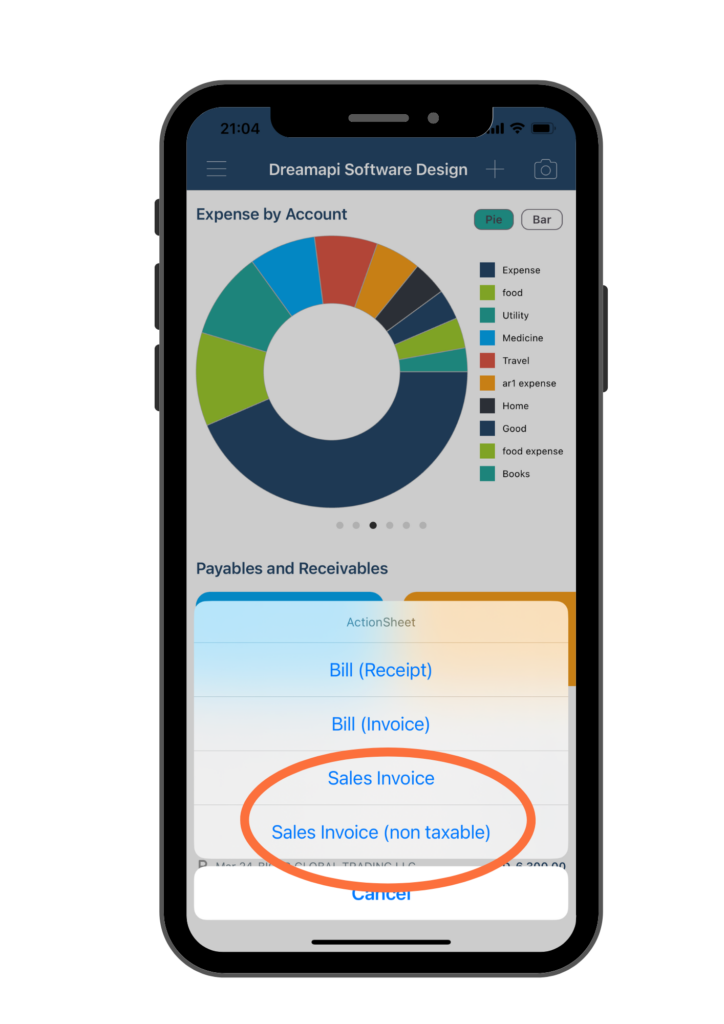
Option 1: Sales Invoice
If you would like to create a sales invoice with taxable items, select Sales Invoice. You will be brought to the Sales Invoice form page to fill in the details.
Follow the steps below to fill in the form.
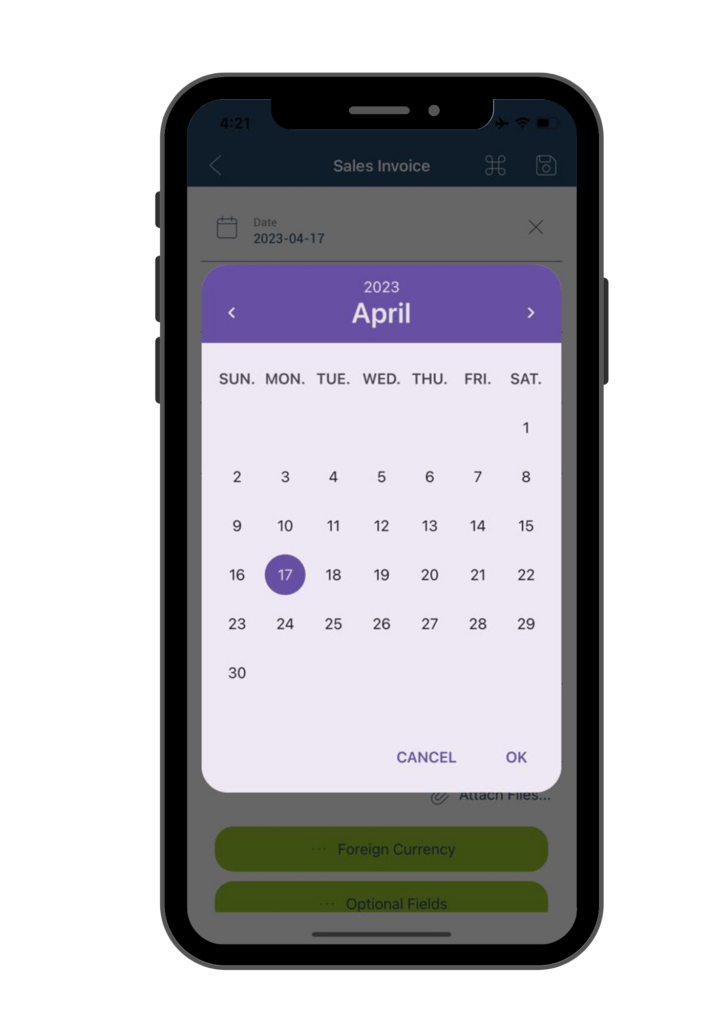
- A. Add or edit Date – Once you are on the Sales Invoice information page, click on Date, a calendar would pop up where you can select the correct date, then click OK to save the change and exit.
- B. Add or edit From Who or Where – Click on From Who or Where, you can then either manually enter the merchant name or, click the “Contact” icon and choose the contact from your phone contact, if this merchant/person is already in your contact list.
Once you enter a contact name in the invoice creation process, our application will automatically save it as a suggestion for future invoices with the same contact. This eliminates the need for manual typing and reduces the risk of typos.
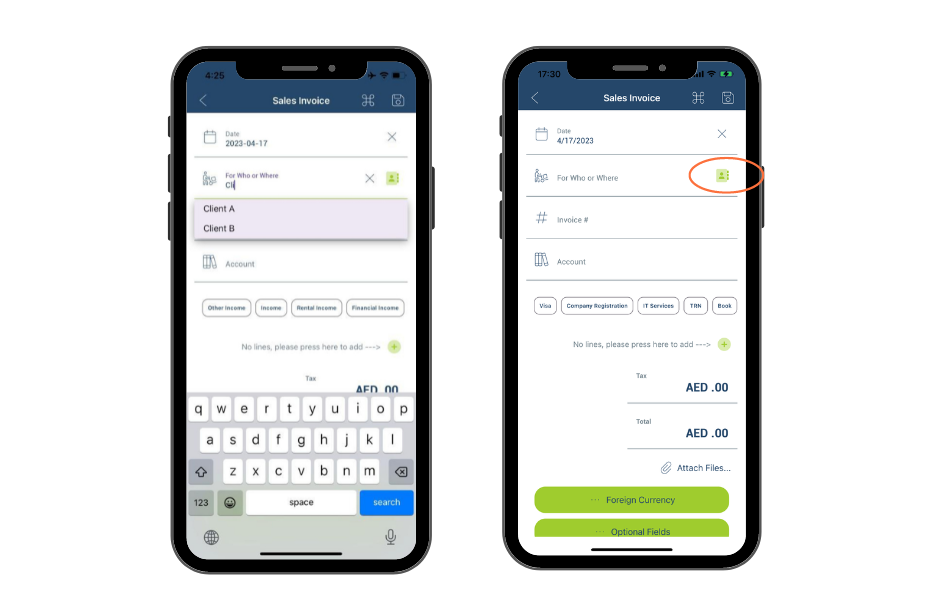
- C. Add or edit Invoice# – Enter your invoice number in this field.
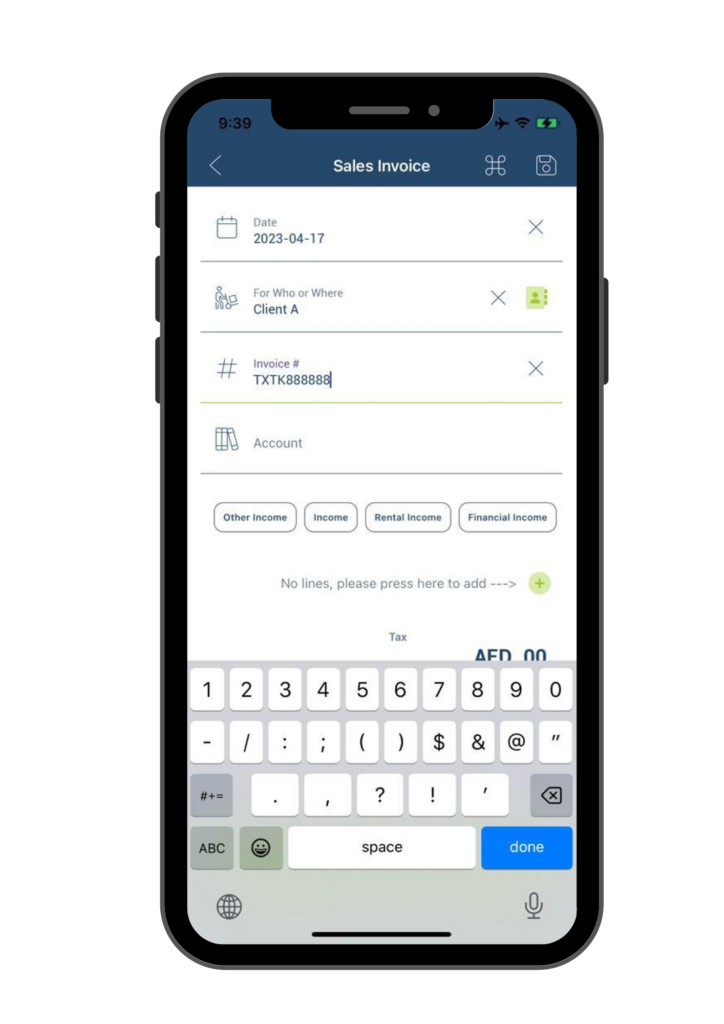
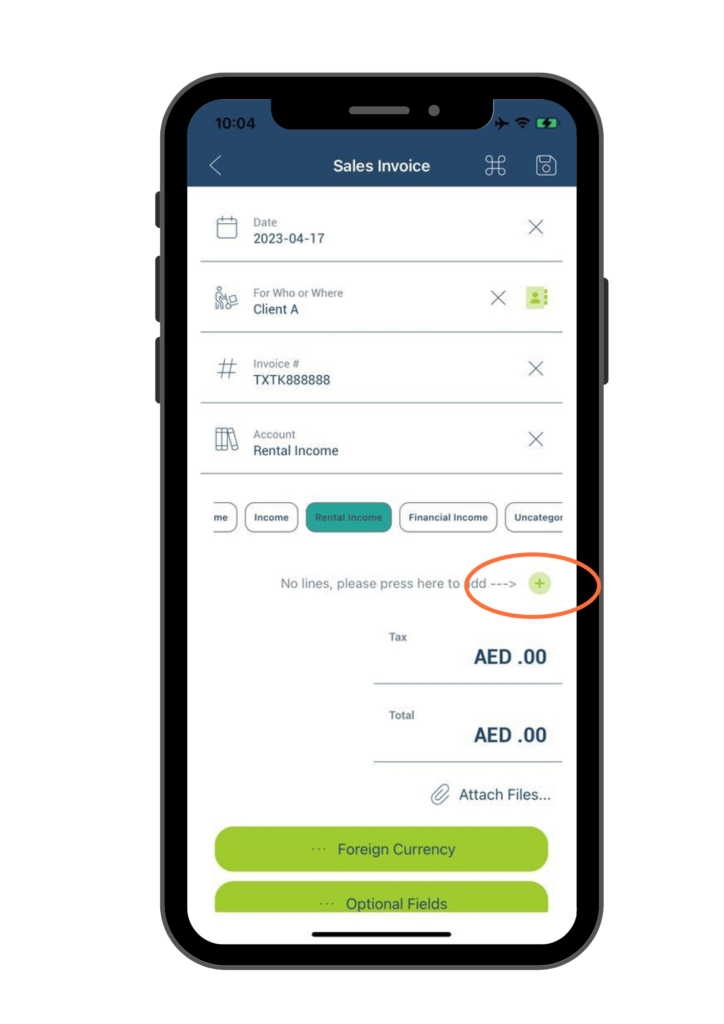
- D. Add or edit Account – To categorize this income correctly against a financial account, you must fill in the Account field. Under the blank field, there is a list of different default accounts that you can choose from. You can swipe left or right to view all the available options and select the most appropriate account. If the desired account is not listed, you can manually enter the account name in the designated field.
Our application will remember the account name you entered and it will appear in the account list for you to choose the next time you create a new sales invoice.

- E. Add line items in Amount – To add an Invoice line item with a dollar amount, click on the “+” icon.
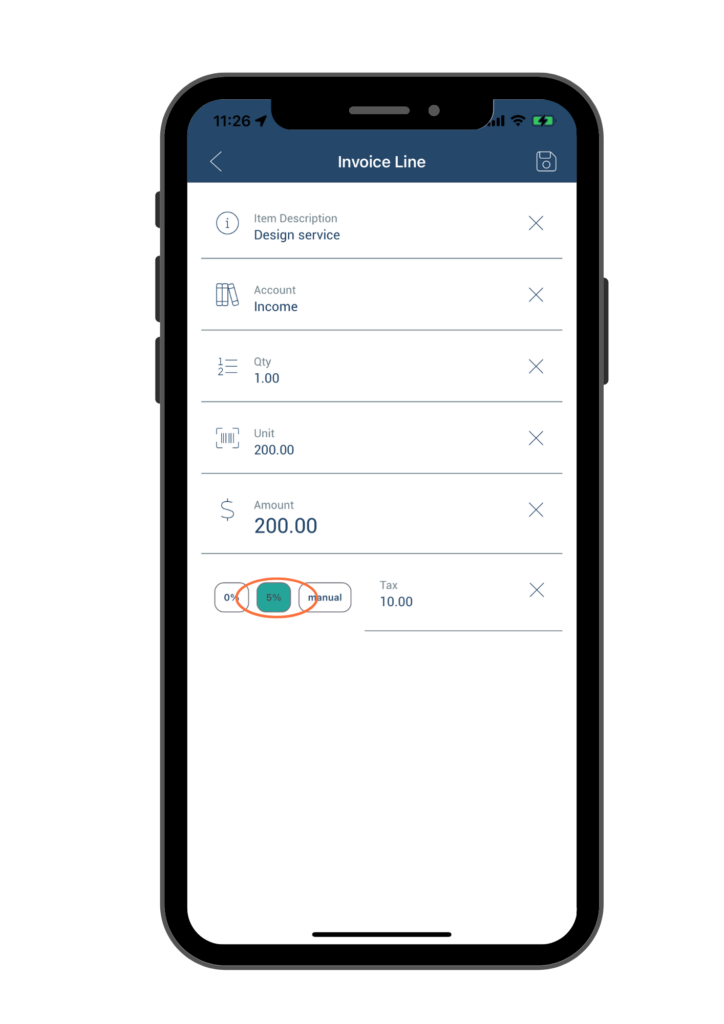
E1. Item Description – This field is used to describe what goods or service your sell to your customer. For example, if you provide a professional design service, you may write “Design service” in this field.
E2. Account – The Account name that was selected/entered on the previous page will be automatically populated here. If necessary, you can change the account name to a different one for the line item.
E3. Quantity – Please input the quantity of goods or services you provide to your client for this specific line item.
E4. Unit price – Please input the unit price of the goods or services for this line item.
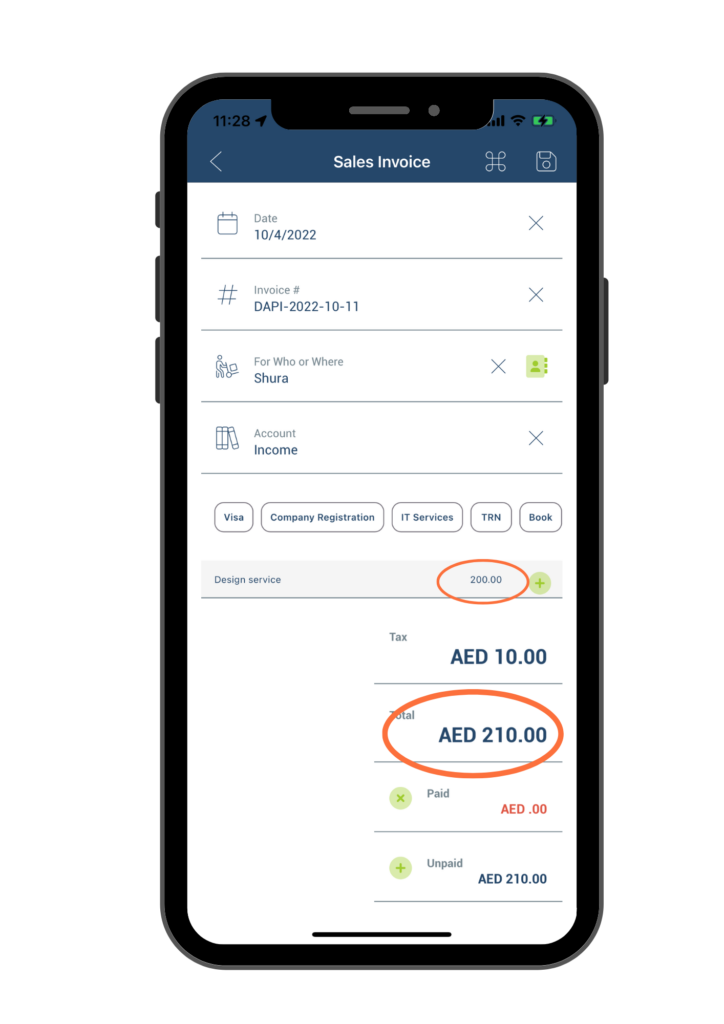
E5. Amount – Once you have entered Quantity and Unit price, the total Amount for the line item will be automatically populated in this field.
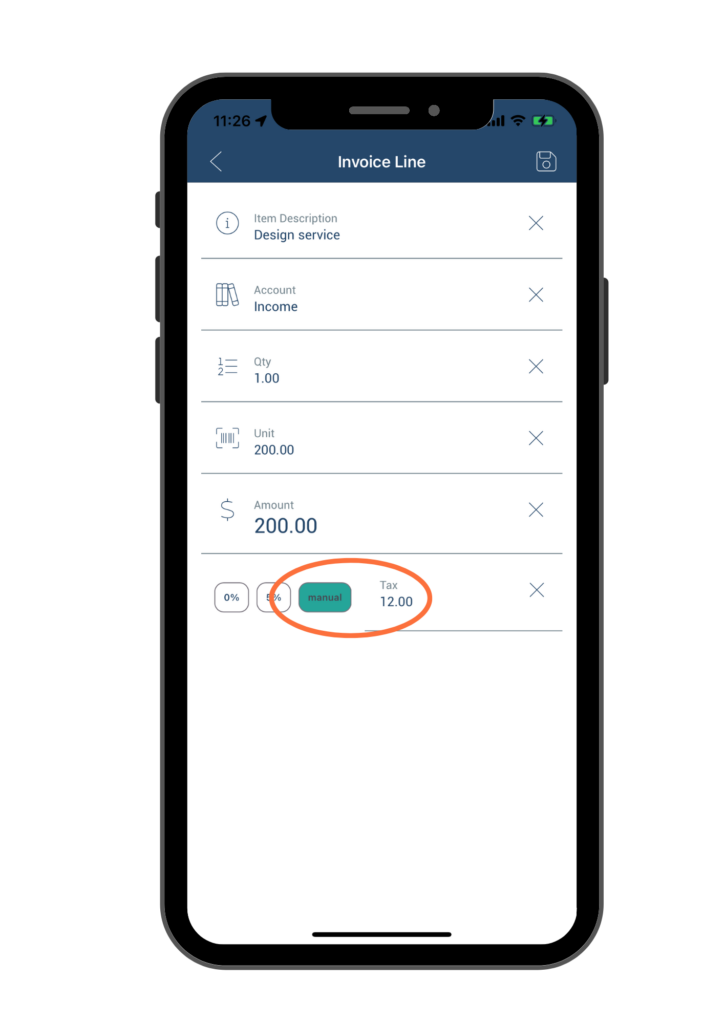
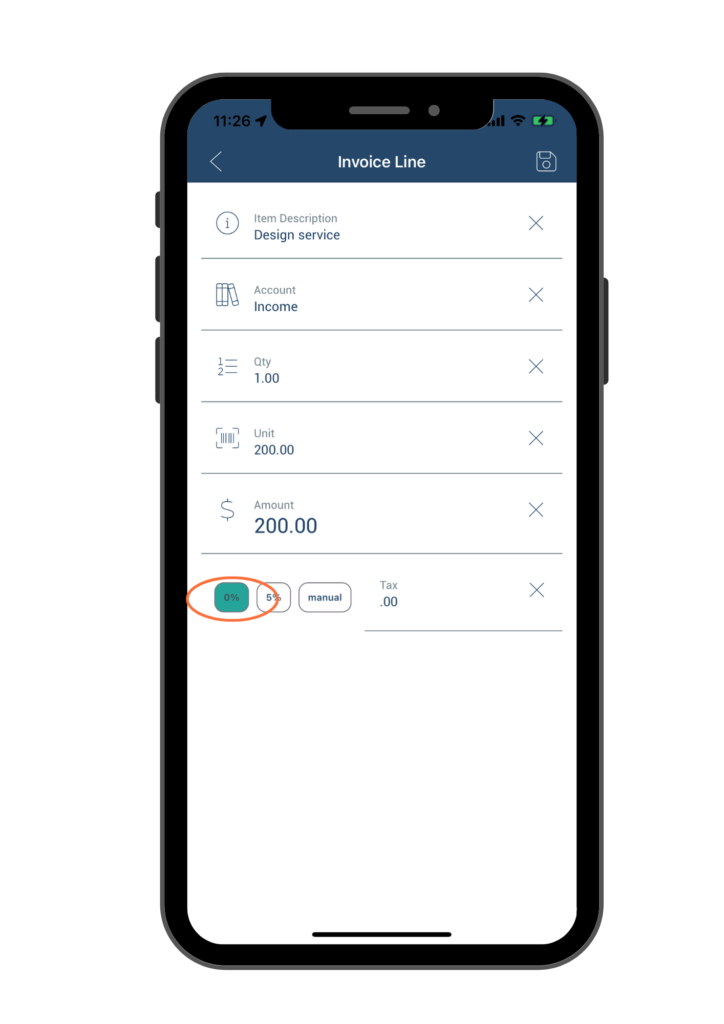
E6. Tax – To include tax applied to your sale, click on the Tax field and input the corresponding tax amount. In UAE, the standard VAT rate is 5%, and you can quickly input this rate by tapping the 5% button.
If a different tax rate was applied, you can tap on the manual button and manually enter the tax amount in the Tax field. Please note that when manually entering the tax, you need to input the exact tax amount instead of the tax rate. For example, if the tax amount is AED 12, you should enter 12 in the Tax field.
To indicate that the line item is not taxed, simply click on the 0% button in the Tax field.
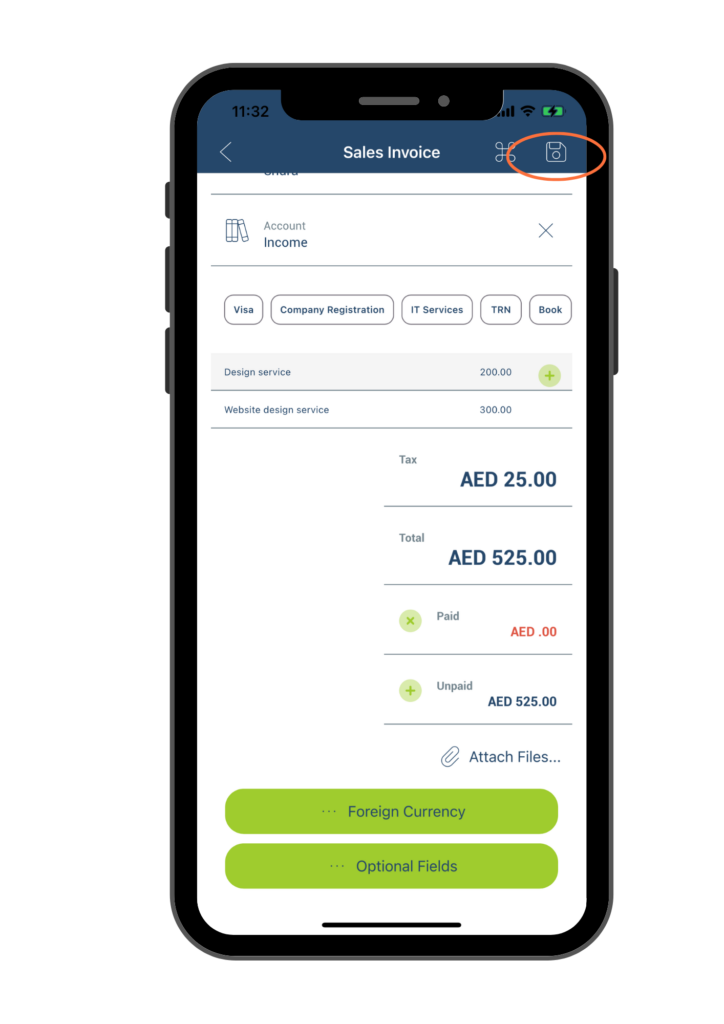
After completing the necessary inputs for the Invoice Line page, click on the Save button located at the upper right corner to save your entries.
You will then return to the previous Sales Invoices information page, where the line item description and amount, tax, and total amount will be automatically updated based on your previous inputs.
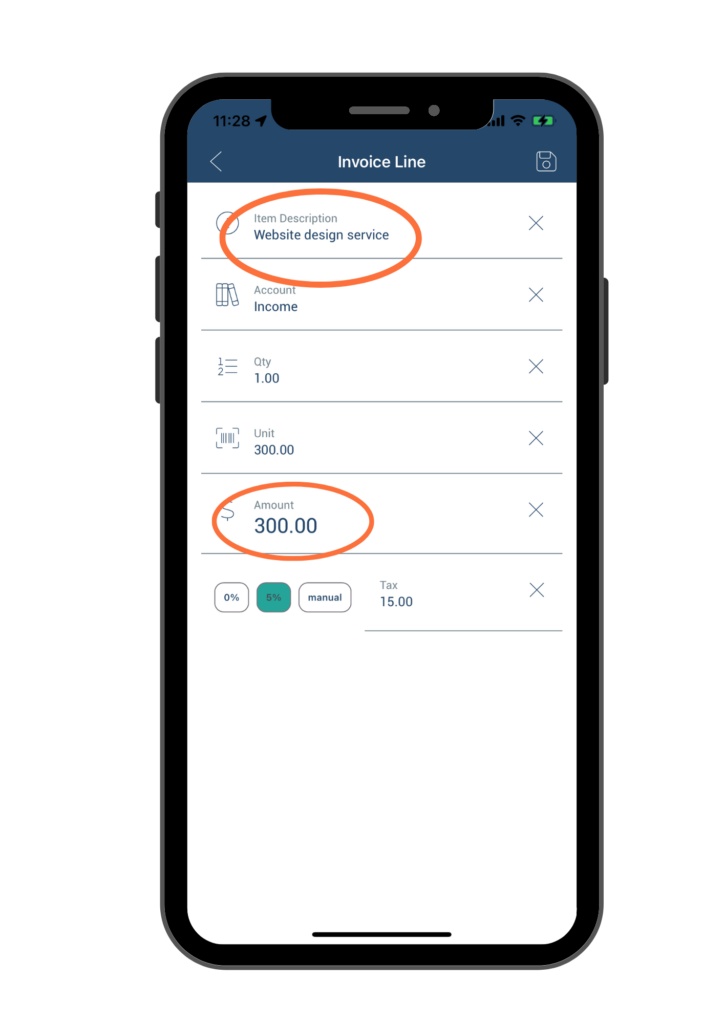
If you have multiple line items on a single sales invoice, you can click on the “+” icon to add additional lines and enter the required information for each line item.
For example, if you have provided another service to this customer that you’d like to put down on the invoice, such as “Website design service” with an amount of AED300, you can add a second line to account for this income. Here is how the Invoice Line information page would appear after you have filled in the required information:
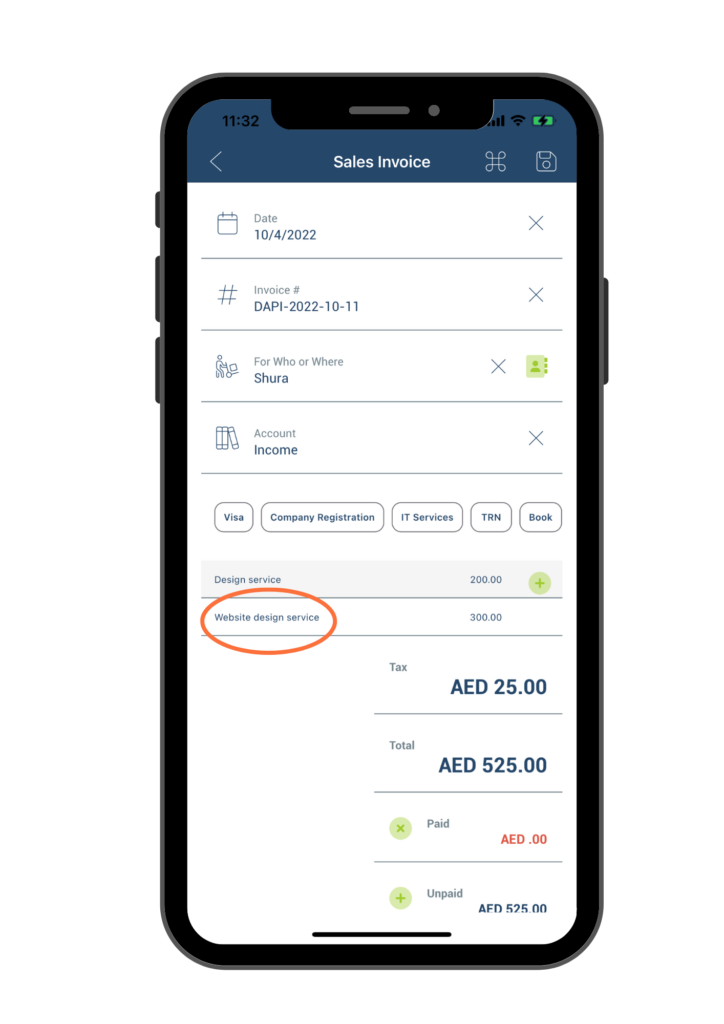
Once saved, you will return to the Sales Invoices information page where you will see the new line items that you have entered.
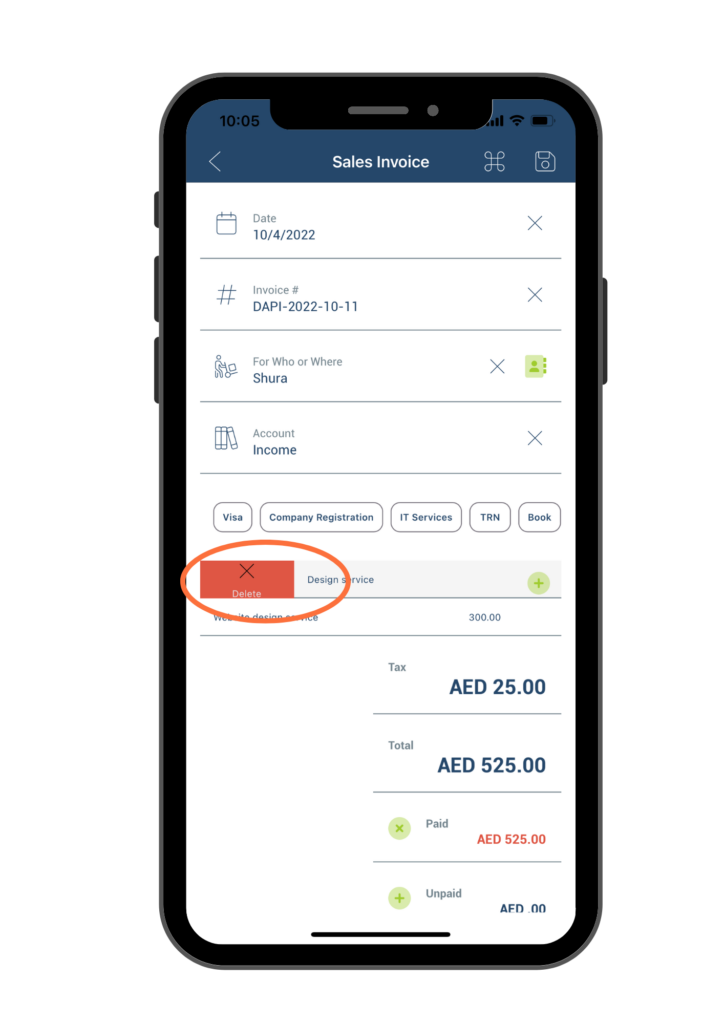
To delete any line items, simply swipe the line item to the right, and a red delete button will appear on the left side of the line. Click on it to delete the item.
- F. Attach Files – To save a copy of the relevant documents for future reference, click on the Attach Files button and upload a photo.
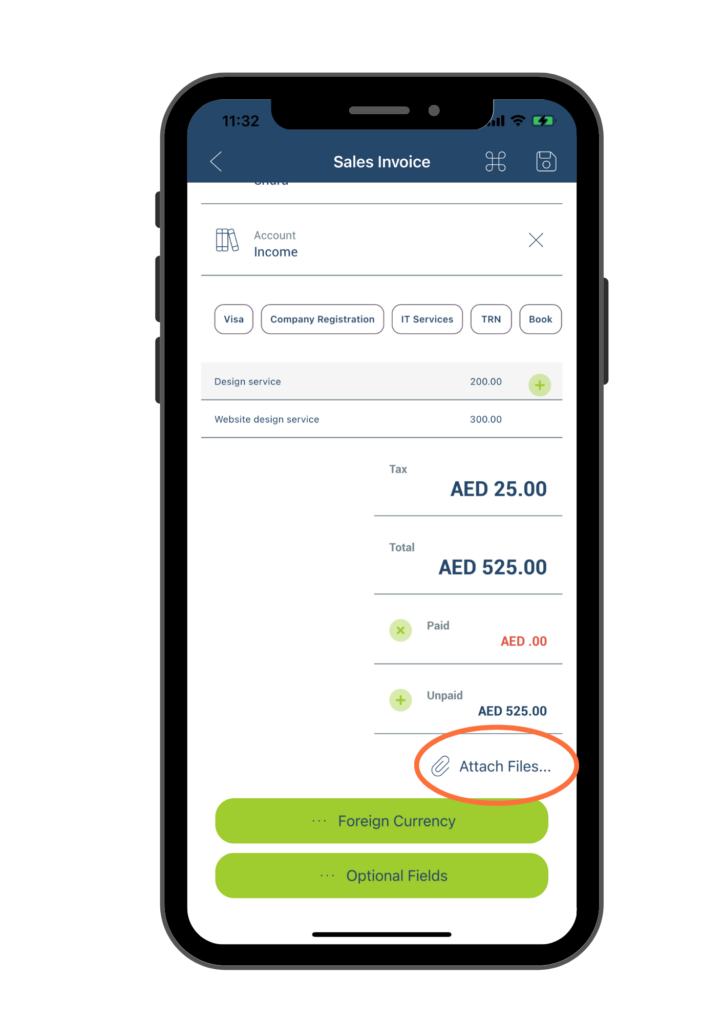
Once you click on the Attach Files button, you can either choose to take a photo of the desired document by selecting Take Photo or choose an existing photo from your library by selecting Pick from photo library. The photo will be automatically uploaded and saved.
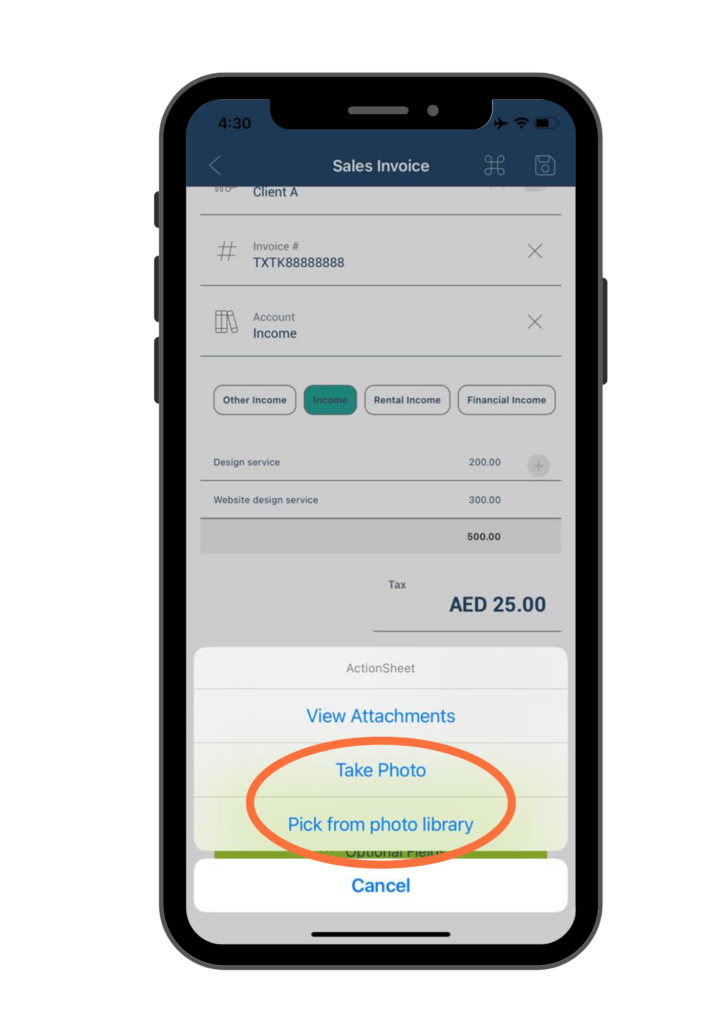
In the future, you can view the saved document photo here by clicking on the attachment file and selecting View Attachment.
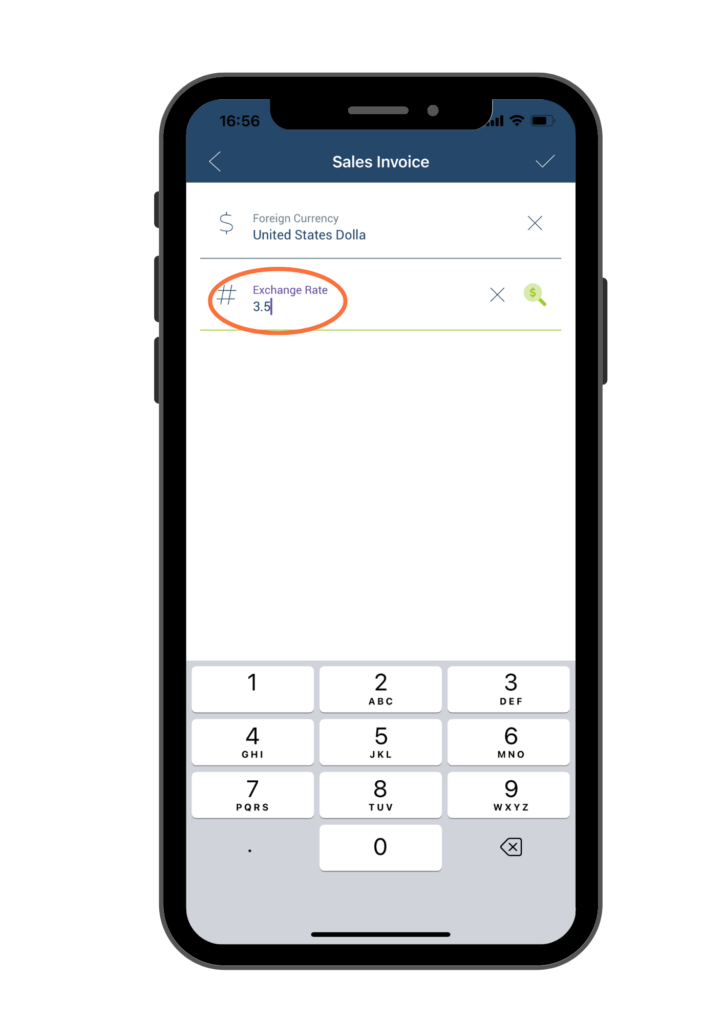
- G. Change Foreign Currency – If the sales invoice is in a foreign currency other than AED, click on the Foreign Currency button to change the currency.

To enter currency information, key in the name of the desired currency in the Foreign Currency field. For example, to select USD, enter “United States Dollar.” Alternatively, you can enter the letter “U,” and the system will suggest “United States Dollar” in a drop-down list. Simply select the appropriate currency from the list.

After entering the name of the foreign currency in the Foreign Currency field, click on the Magnifying Glass icon to retrieve the real-time currency rate. Once the rate is populated, click the Check button at the upper right corner to save the change.
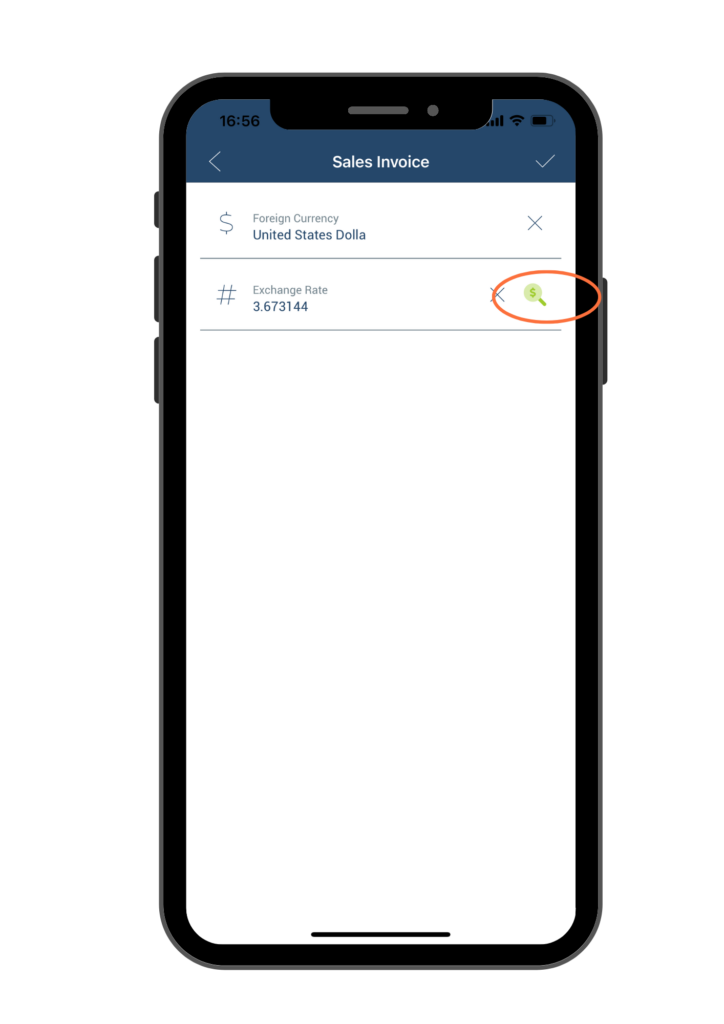
To manually enter a different currency rate, type the desired rate in the Exchange Rate field, then click the Check button at the upper right corner to save the change.
Once saved, you will return to the Sales Invoice information page for the next steps.
- H. Add or edit Optional Fields
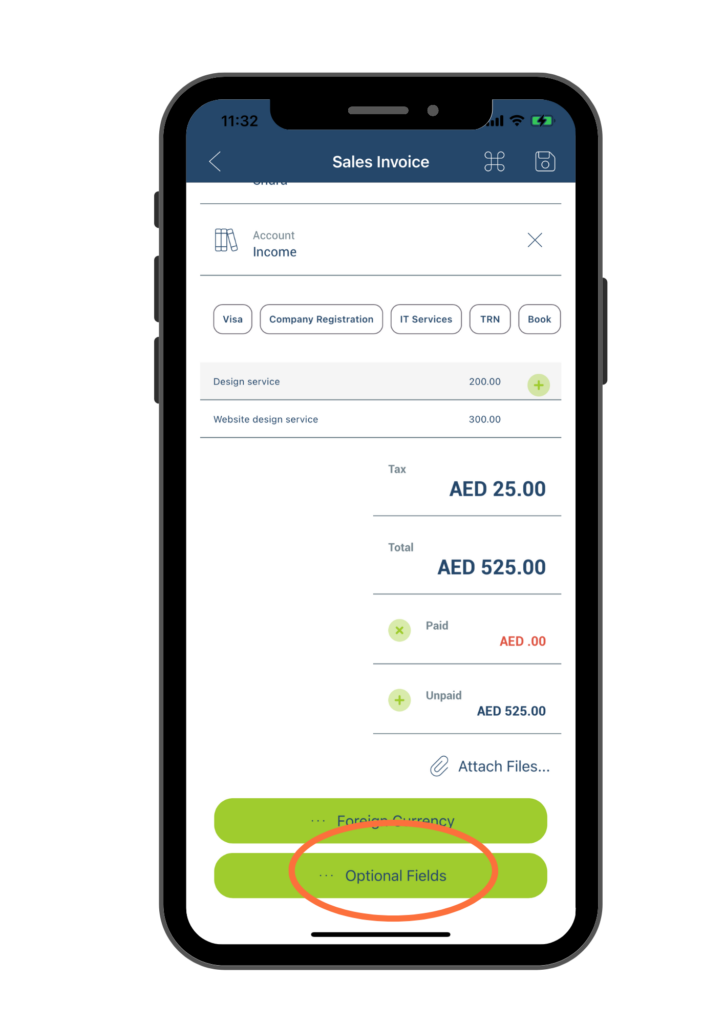
You will be directed to the page shown below, where you can enter additional information about the sales invoice. Please see below for a detailed description of each field:
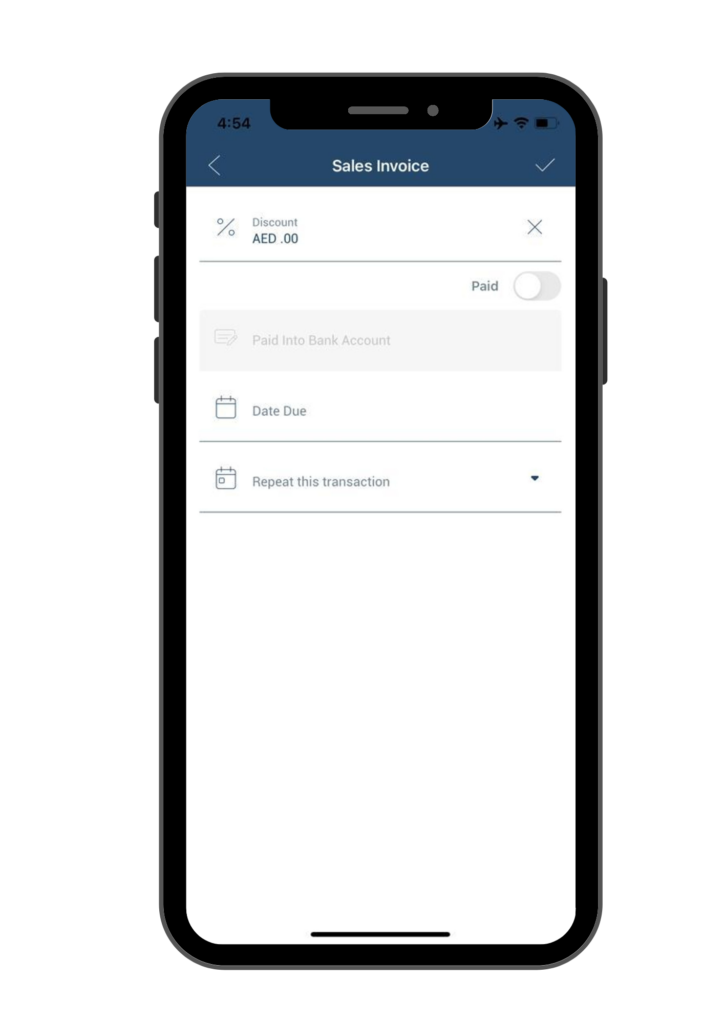
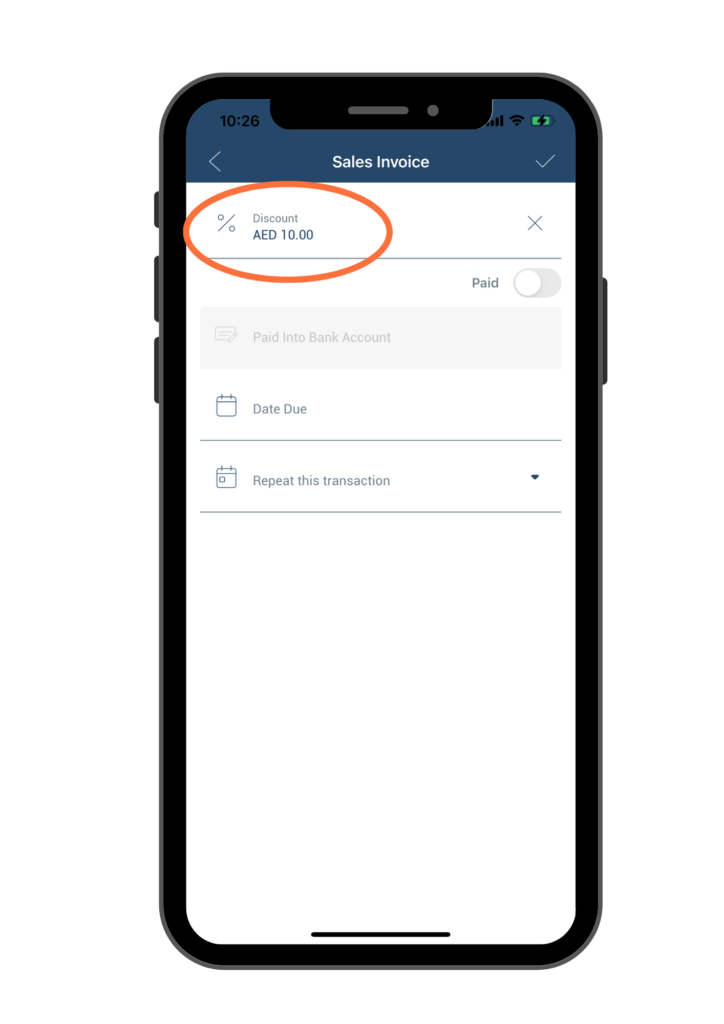
- a. Discount – Enter the discount dollar amount here if you provide a discount to the client. For example, if you provide a discount at AED 10, enter 10 here.
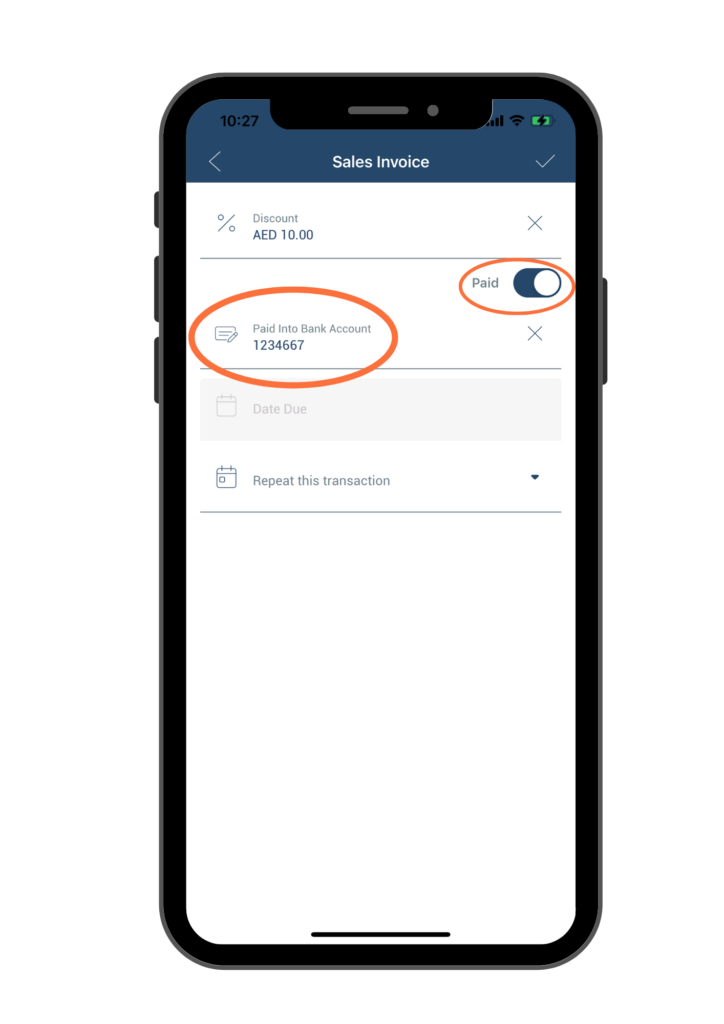
- b. Paid toggle– By default, the Paid toggle is turned off, indicating that the customer has not paid the invoice yet.
b1. If the customer has already paid for the invoice, please toggle the switch to the right to indicate that it has been paid. Then, enter the bank account that received this payment in the Paid Into Bank Account field.
b2. If the customer has not yet paid for the invoice, keep the toggle unchanged (i.e., the toggle should remain on the left side). Next, click on the Date Due field.
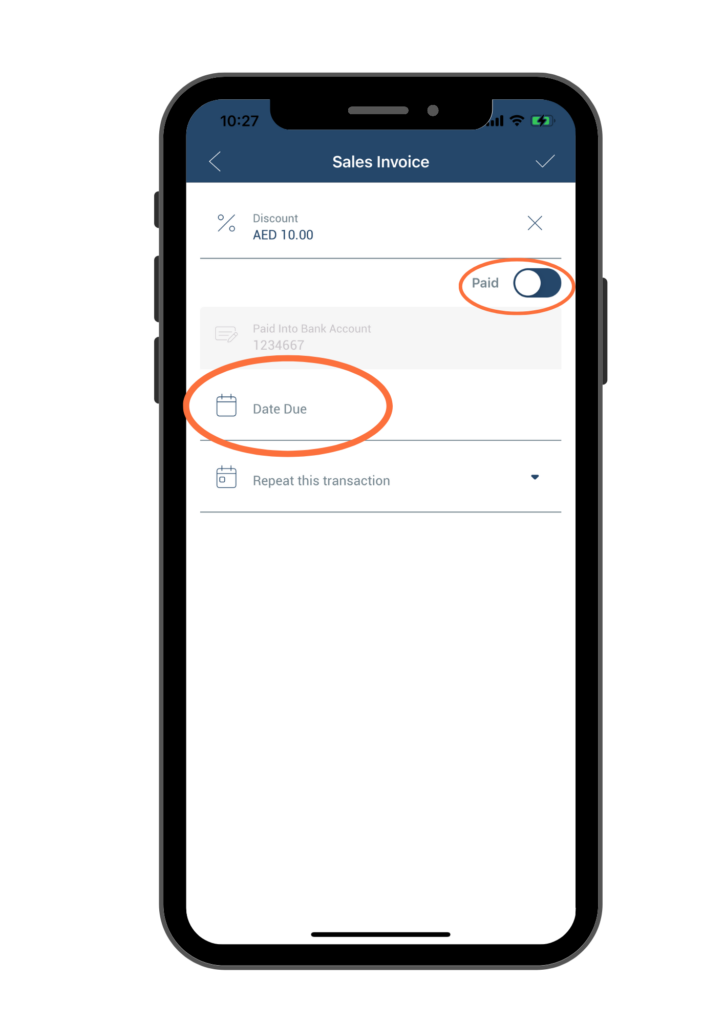
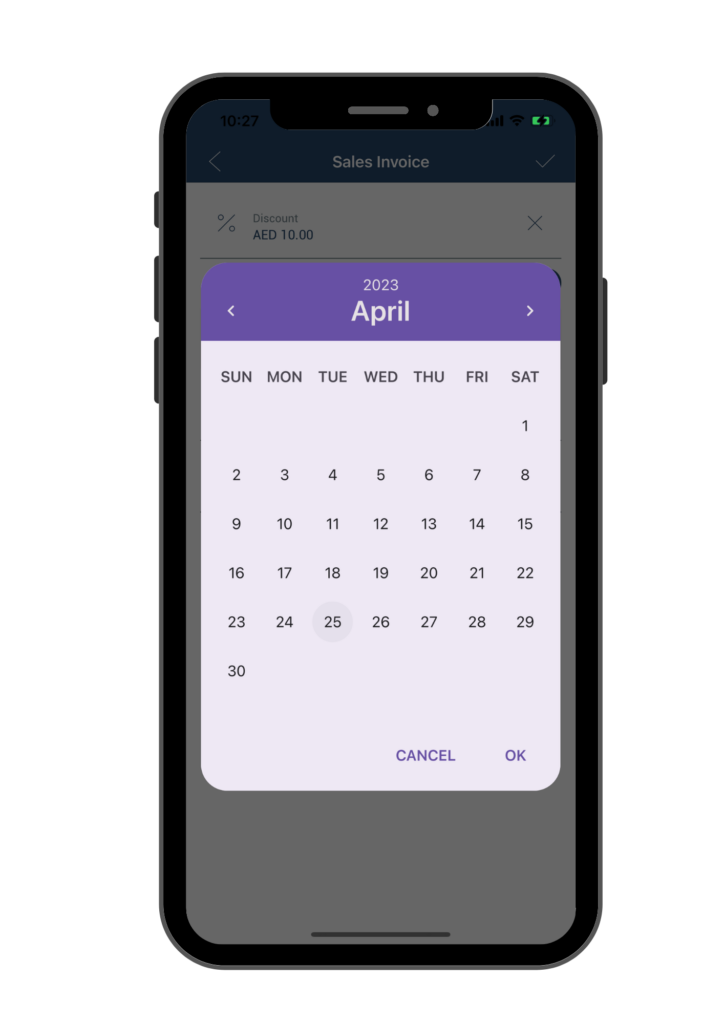
On the pop-up calendar, select the date that this sales invoice is due. Make sure that the date you select is in the future.
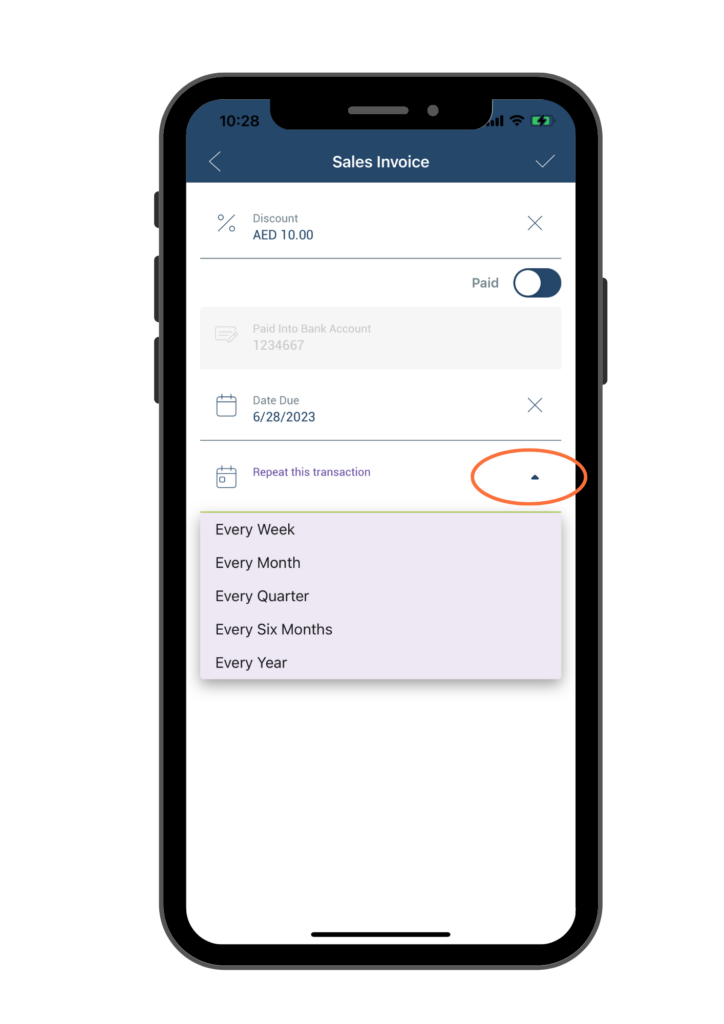
- c. Repeat This Transaction – If this purchase is going to happen repeatedly, you can choose the frequency of this transaction by clicking on the dropdown arrow. Then, select the appropriate frequency from the list provided.
Once you have entered all the required information, you can save it by clicking on the check mark button located at the upper right corner of the page. You will return to the previous Sales Invoice information page.
After entering all the necessary Sales Invoice information, click on the Save button located at the upper right corner to save this entry.
Once you have clicked on the Save button, you will be presented with two options:
- Print Sales Invoice – This option will allow you to generate a sales invoice electronically, which you can then send to the customer or save on your device. For detail instructions, please refer to Print Sales Invoice section.
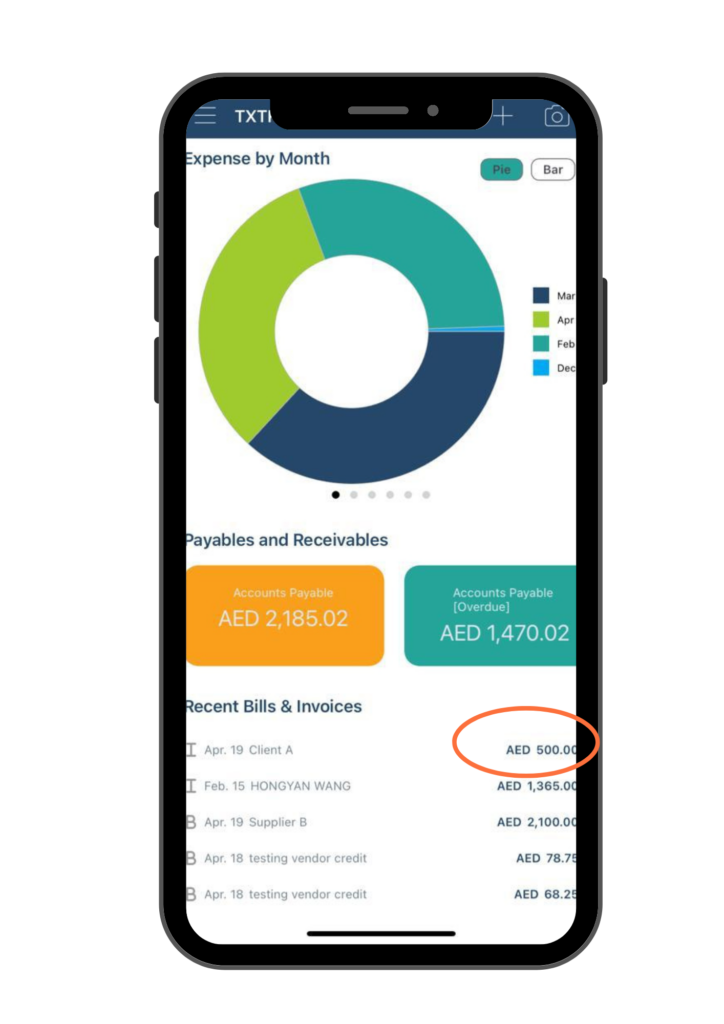
- Go back – This option will take you back to the home page. After going back, you can refresh the home page by pulling down the page to view and manage the new entry. Once returned on the home page, refresh the page by pulling it down. The dashboard will be adjusted accordingly. Additionally, a new entry will appear in the Recent Bills & Invoices section with a letter “I” on the left side, indicating that it is a Sales Invoice. You can double-click on this entry to review and edit its details.
Option 2: Sales Invoice (non taxable)
Option 2 is designed for non-taxable items and therefore does not have a tax line on the information page or when you add line items to the Amount field. This is the only difference between Option 1 and Option 2.
Note: As many features of Option 2 are similar to those of Option 1, you can refer to Option 1 Sales Invoice for detailed instructions on adding or editing information.
As previously mentioned in Option 1, after filling out all required fields on the Sales Invoice information page and clicking the Save button, you will be presented with two options:
- Print Sales Invoice – This option will allow you to generate a sales invoice electronically, which you can then send to the customer or save on your device. For detail instructions, please refer to Print Sales Invoice section.
- Go back – This option will take you back to the home page. After going back, you can refresh the home page by pulling down the page to view and manage the new entry.