Manage Contacts
1. Add or Edit Contacts
To create a new contact in Miragebooks, you can do it while creating a journal entry. Simply enter the names of your suppliers or clients in the “From/For Who or Where” fields, and the name of the contact will be recorded and stored in the Contacts of the application.
If you want to add a new contact without creating a journal entry, or if you want to edit an existing contact, you can use the Contacts feature in Miragebooks. This allows you to add or edit contact details, such as the name, address, tax registration number, etc.
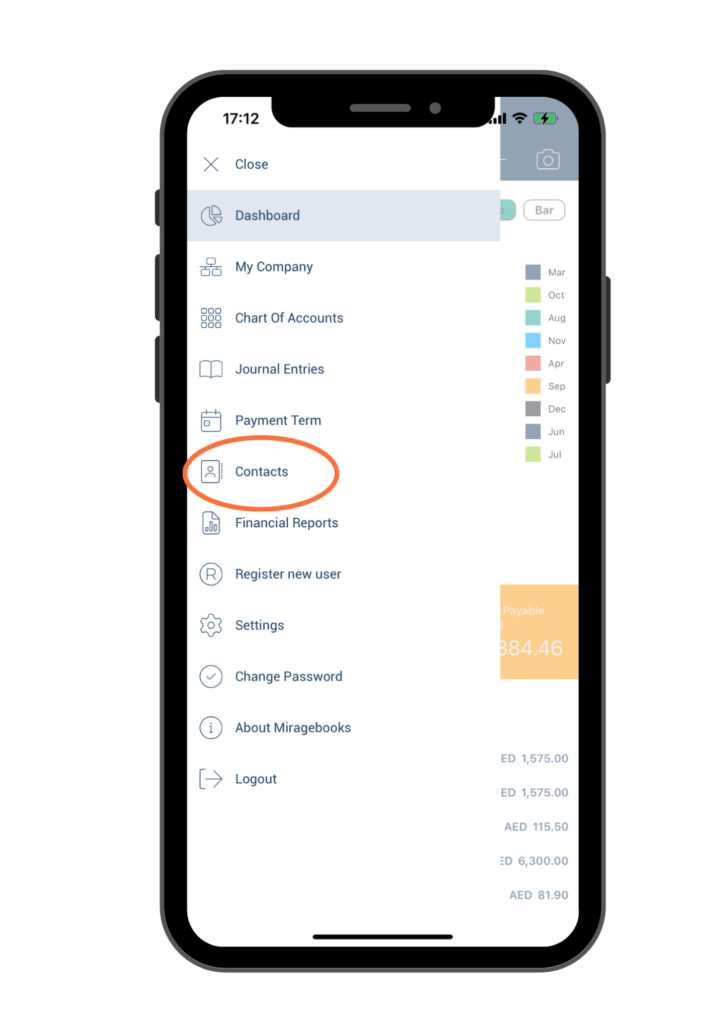
Click the hamburger icon on the home page, then select Contacts from the menu list.
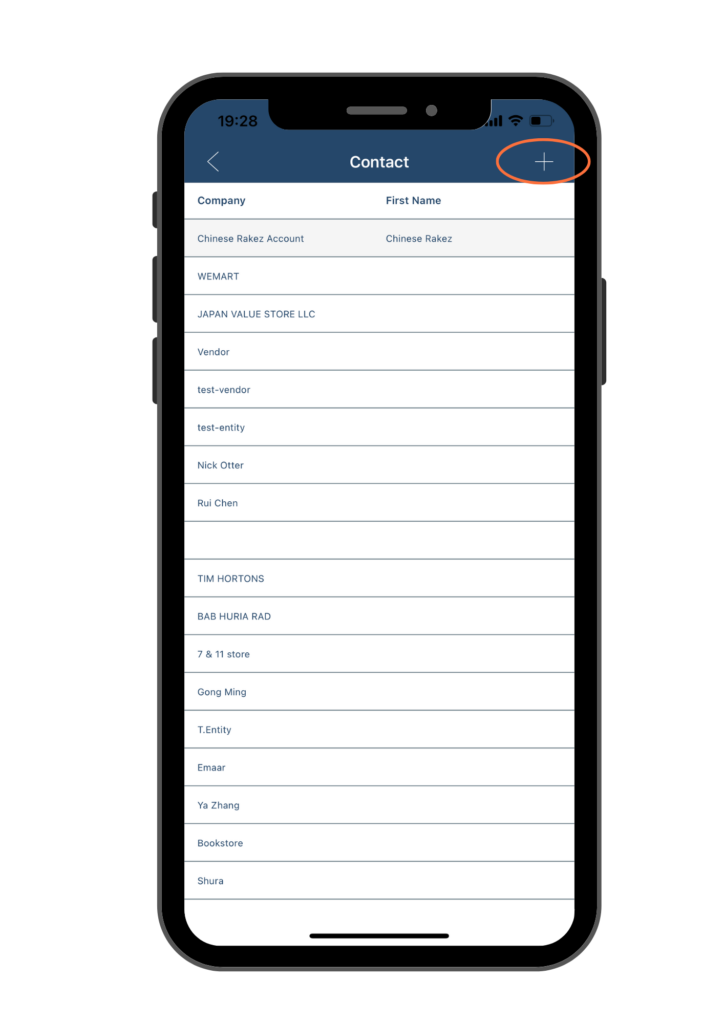
You will then see a list of existing contacts that have been created through previous journal entries.
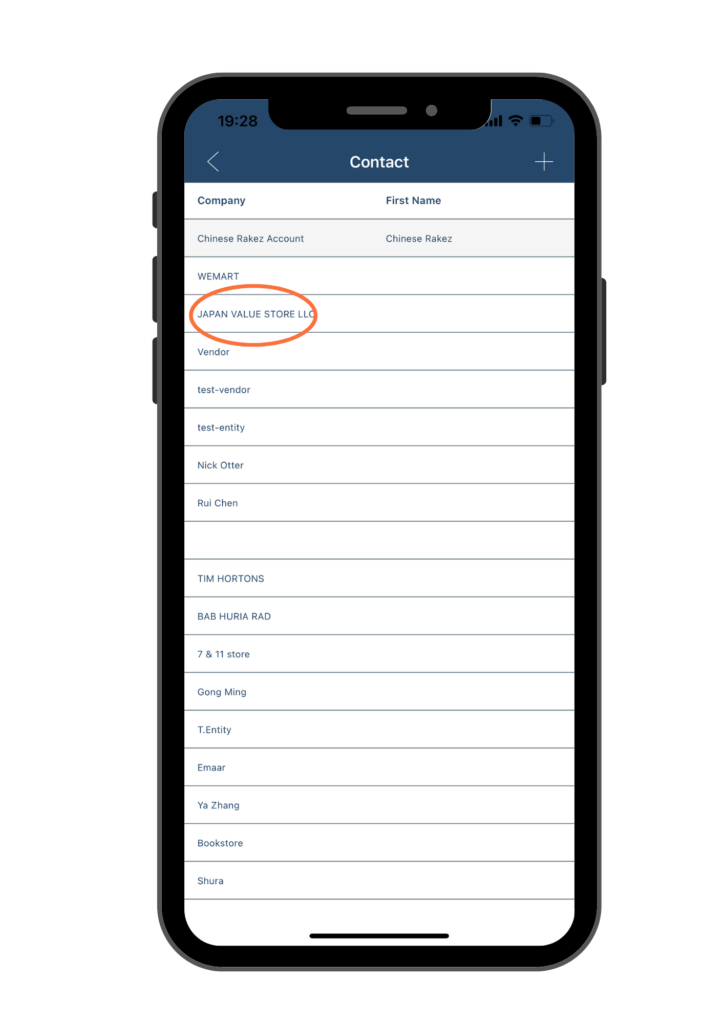
To add a new contact, click on the “+” button at the upper right corner of the page. To edit an existing contact, double-click on the desired contact to open its details and make the necessary changes
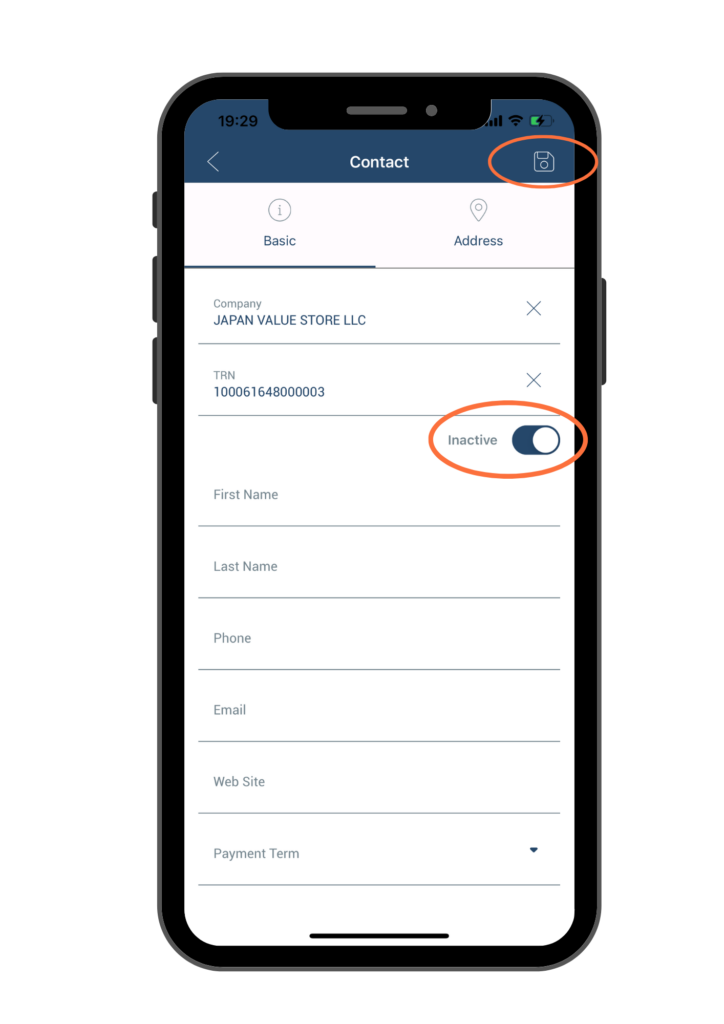
On the next page, fill in or edit the information in both Basic and Address tabs, then click Save button at the upper right corner of the page.
Please note that on the Basic tab, you can enter your company’s Tax Registration Number in TRN field if you have one. Additionally, you can choose the Payment Term for this contact from the drop down list at the bottom of Basic tab. For detailed instructions about setting payment terms, please refer to Payment Term section.
After you create a contact in Miragebooks, the next time you create a journal entry, Miragebooks will suggest the contact’s name as you type the first few letters in the From/For Who or Where field.
2. Inactivate Contacts
If you want to make a specific contact inactive and prevent it from appearing while creating a journal entry, you can do so in the Contacts.
Click the hamburger icon on the home page, then select Contacts from the menu list.
Double click on the contact that you would like to inactivate.
Then toggle the Inactive switch to the right and click the Save button at the upper right corner of the page.